The Keys to Spelling Success: Part 1

(POST PART 1/3)

I’m often asked, “Why does it seem that my child can read well but struggles with spelling?” The short answer is that reading is a task that requires recognition, but spelling is one that requires production.

The best way for students to learn how to produce a written word is by teaching them about language so that words can be permanently stored in their long-term memories. Students learn best through knowledge of language, not rote memorization.

This means that we cannot supply students with lists we expect to be memorized. We must make learning about language an integral part of spelling instruction to maximize successful outcomes. Spelling instruction should be packed with many key components to grow strong spellers.

Here are three of the ten (the next six coming in upcoming posts) components I ensure to integrate into my spelling instruction.

  1. Phoneme-grapheme correspondence

    This means making sure that students can match a grapheme (one or more letters) with the sound it makes. For example, the short e sound can be represented by the grapheme “e” as in echo or the grapheme “ea” as in bread. An important part of phonemic-grapheme correspondence within spelling is the ability to segment a word or syllable into individual sounds and knowing that each of those sounds is represented by a grapheme. I often use this portable sound wall as a reference to support and discuss phoneme-grapheme relationships. Remember, a phoneme is a sound and a grapheme is one or more letters that represents that phoneme. Some sounds have only one representation while others have many more.

  2. Syllable types

    There are six syllable types: open, closed, magic E, r-controlled, vowel team / diphthong, and consonant + LE. Syllable types matter in spelling because students have to know that each syllable must have a written vowel. When segmenting the sounds of a word — or syllables of a multisyllabic word — it is helpful for students to think about the type of syllable they are writing to ensure the appropriate vowel placement. The word PURPLE is a prime example. If a student segments this word they have to think hard about the two syllable types in order to get the vowel placement accurately. In the first syllable, they will know it’s an r-controlled syllable type and the vowel will come before the R. For the second syllable, they recognize this as a c + le syllable type and know that the two syllables together spell PUR/PLE.

  3. Rules and generalizations

    The English language certainly has its share of rules and generalizations; however, when we explicitly teach them in a systematic and simplified way, they can aid enormously in one’s spelling ability. Some of these rules include each syllable having a vowel, when to use CK vs. K for a final /k/ sound, when to drop a final E, when to double a consonant, and the many hats worn by the silent finale E.

Read Keys 4-6 here.

Come Join the MW LITERACY® Instagram Community

Sign up here for bite-sized doses of professional development delivered to your inbox each week.

Supporting Upper Elementary Readers

I’ll never forget what a colleague of mine told me in my early days of teaching: “Once the kids get to third grade, there isn’t a way to help them figure out a word. You just have to tell them what it is, and then they’ll memorize it.” 🙄

I know, I know. 

This didn’t sit well with me, but I had no authority and little experience with this grade level at the time. What I did, however, was my own detective work to uncover the truth, and to help those students out.

You cannot tell me that once a child is in third grade reading instruction ends, and that there is no way to support these readers to read the longer, multisyllabic words in their chapter books and content texts across curricula.

So what did I do? I watched and listened. I observed the types of words that were stumping these readers. 

Here is what I discovered about most of them:

  • With some of the words, students could have used knowledge of advanced phoneme-grapheme relationships to blend and sound out words. They could have tried different sounds made by the same letter. For example, EA and CH each make three different and unique sounds. 

  •  If students had been provided explicit instruction on syllable types, they could have identified where the division occurs in each word and divide the word into manageable syllables. 

  • They could have isolated the root, base, and affixes, thereby also making the word more manageable to decode. 

10+ years later and I still cringe when I think about that comment, and at the thought of this idea (or rather, lie) being perpetuated — that reading instruction at the intermediate and upper elementary level comes to a halt because the words “can’t be sounded out” like readers are taught to do in K-2.

As students get older and have more advanced texts in their hands, we must move with them and guide them and give them more advanced strategies. It’s no coincidence that this is also the age when students, who once liked to read, avoid it. There is an absence of explicit strategies to support them. It’s now hard. It’s frustrating. It’s no longer enjoyable. 

Decoding text is just one component of the ability to be a proficient reader. We need comprehension as well. However, if students cannot master decoding fluently, they will not be able to work on comprehending efficiently. With explicit instruction in advanced phonemic and phonological awareness, syllable division, and morphology, we can help bridge that instructional gap and provide students with what they need to guide them towards becoming competent and confident readers who actually want to read once they cross the bridge from the lower elementary grades to the upper elementary grades. One best practice at a time, and we CAN appropriately support and motivate these transitional readers.

Sentence Scooping as a Fluency Tool

Fluency is more than just reading at a certain speed. A fluent reader will read smoothly at an appropriate rate with accuracy and prosody. A slow speed and / or choppy reading, lack of expression, inability to acknowledge the function of punctuation, and incorrectly grouping words and phrases within a sentence, will also contribute to inadequate comprehension of the text.

That last piece — incorrectly grouping words — can really make or break a student’s overall flow, and thus, ability to comprehend what he or she has read. This is where scooping comes in. Scooping is the ability to appropriately chunk — or group — words and phrases to produce a smoother and more meaningful reading of the text. While scooping can be implemented successfully with younger readers, this tool is particularly helpful for older students who are reading more complex sentences and will not benefit from pointing to each word in simple sentences. They must learn to scoop. First, they will learn to do it with a visual, but eventually, they will do it automatically, reaching their goal of fluency.

Here is an example of a compound sentence with scooped phrases. While you do not have to, it can be helpful in the introductory stages of scooping instruction to have students use a different color for each scoop. However, using different colors for each scoop WILL be beneficial when text within a scoop is split between lines. You may also use just two different color and alternate between them. Once the scoops are drawn, students may initially use their finger to “swoop each scoop” as they read, paying attention to punctuation more closely, and adding expression.

When introducing this method, you may choose to use the gradual release of responsibility model, a structured method that aims to provide the student responsibility of the content taught in gradual steps until they are capable of completing the task independently. In this case, after you have explained the concept of scooping, you would take these steps:

  1. YOU scoop a sentence to model how it’s done.

  2. YOU AND THE STUDENT work on scooping a sentence together.

  3. THE STUDENT scoops a sentence independently.

With practice of this strategy, students will be able to focus on one scoop at a time, making the text more conducive for fluent reading. With even more practice, students will not need to mark the scoops, as they will be able to do this with automaticity and arrive one step closer to a goal of fluent reading.

One quick note about scooping and fluency: For scooping to be effective, students must have strong phonological awareness. They must be able to decode and have a proficient awareness of phoneme-grapheme relationships. Without this fundamental base, scooping will not be a useful tool yet.

Looking for more ways to work on fluency at the upper level? I created these monthly fluency sets (available as a bundle or individually) to support students working towards fluency (and comprehension) with complex sentence structures, multisyllabic words, and tier 2 vocabulary. These texts are a few sentences and bridge the transition from sentence level fluency to longer passage fluency.

Come Join the MW LITERACY® Instagram Community

Sign up here for bite-sized doses of professional development delivered to your inbox each week.

Coordinating Conjunctions Craft Activity

Conjunction junction, what’s your function? were the famous Schoolhouse Rock words. (And it’s still impossible to talk about conjunctions without hearing them.) There are three categories of conjunctions: coordinating, subordinating, and correlative. They are all specific words that connect phrases, words, and clauses. This post focuses exclusively on coordinating conjunctions

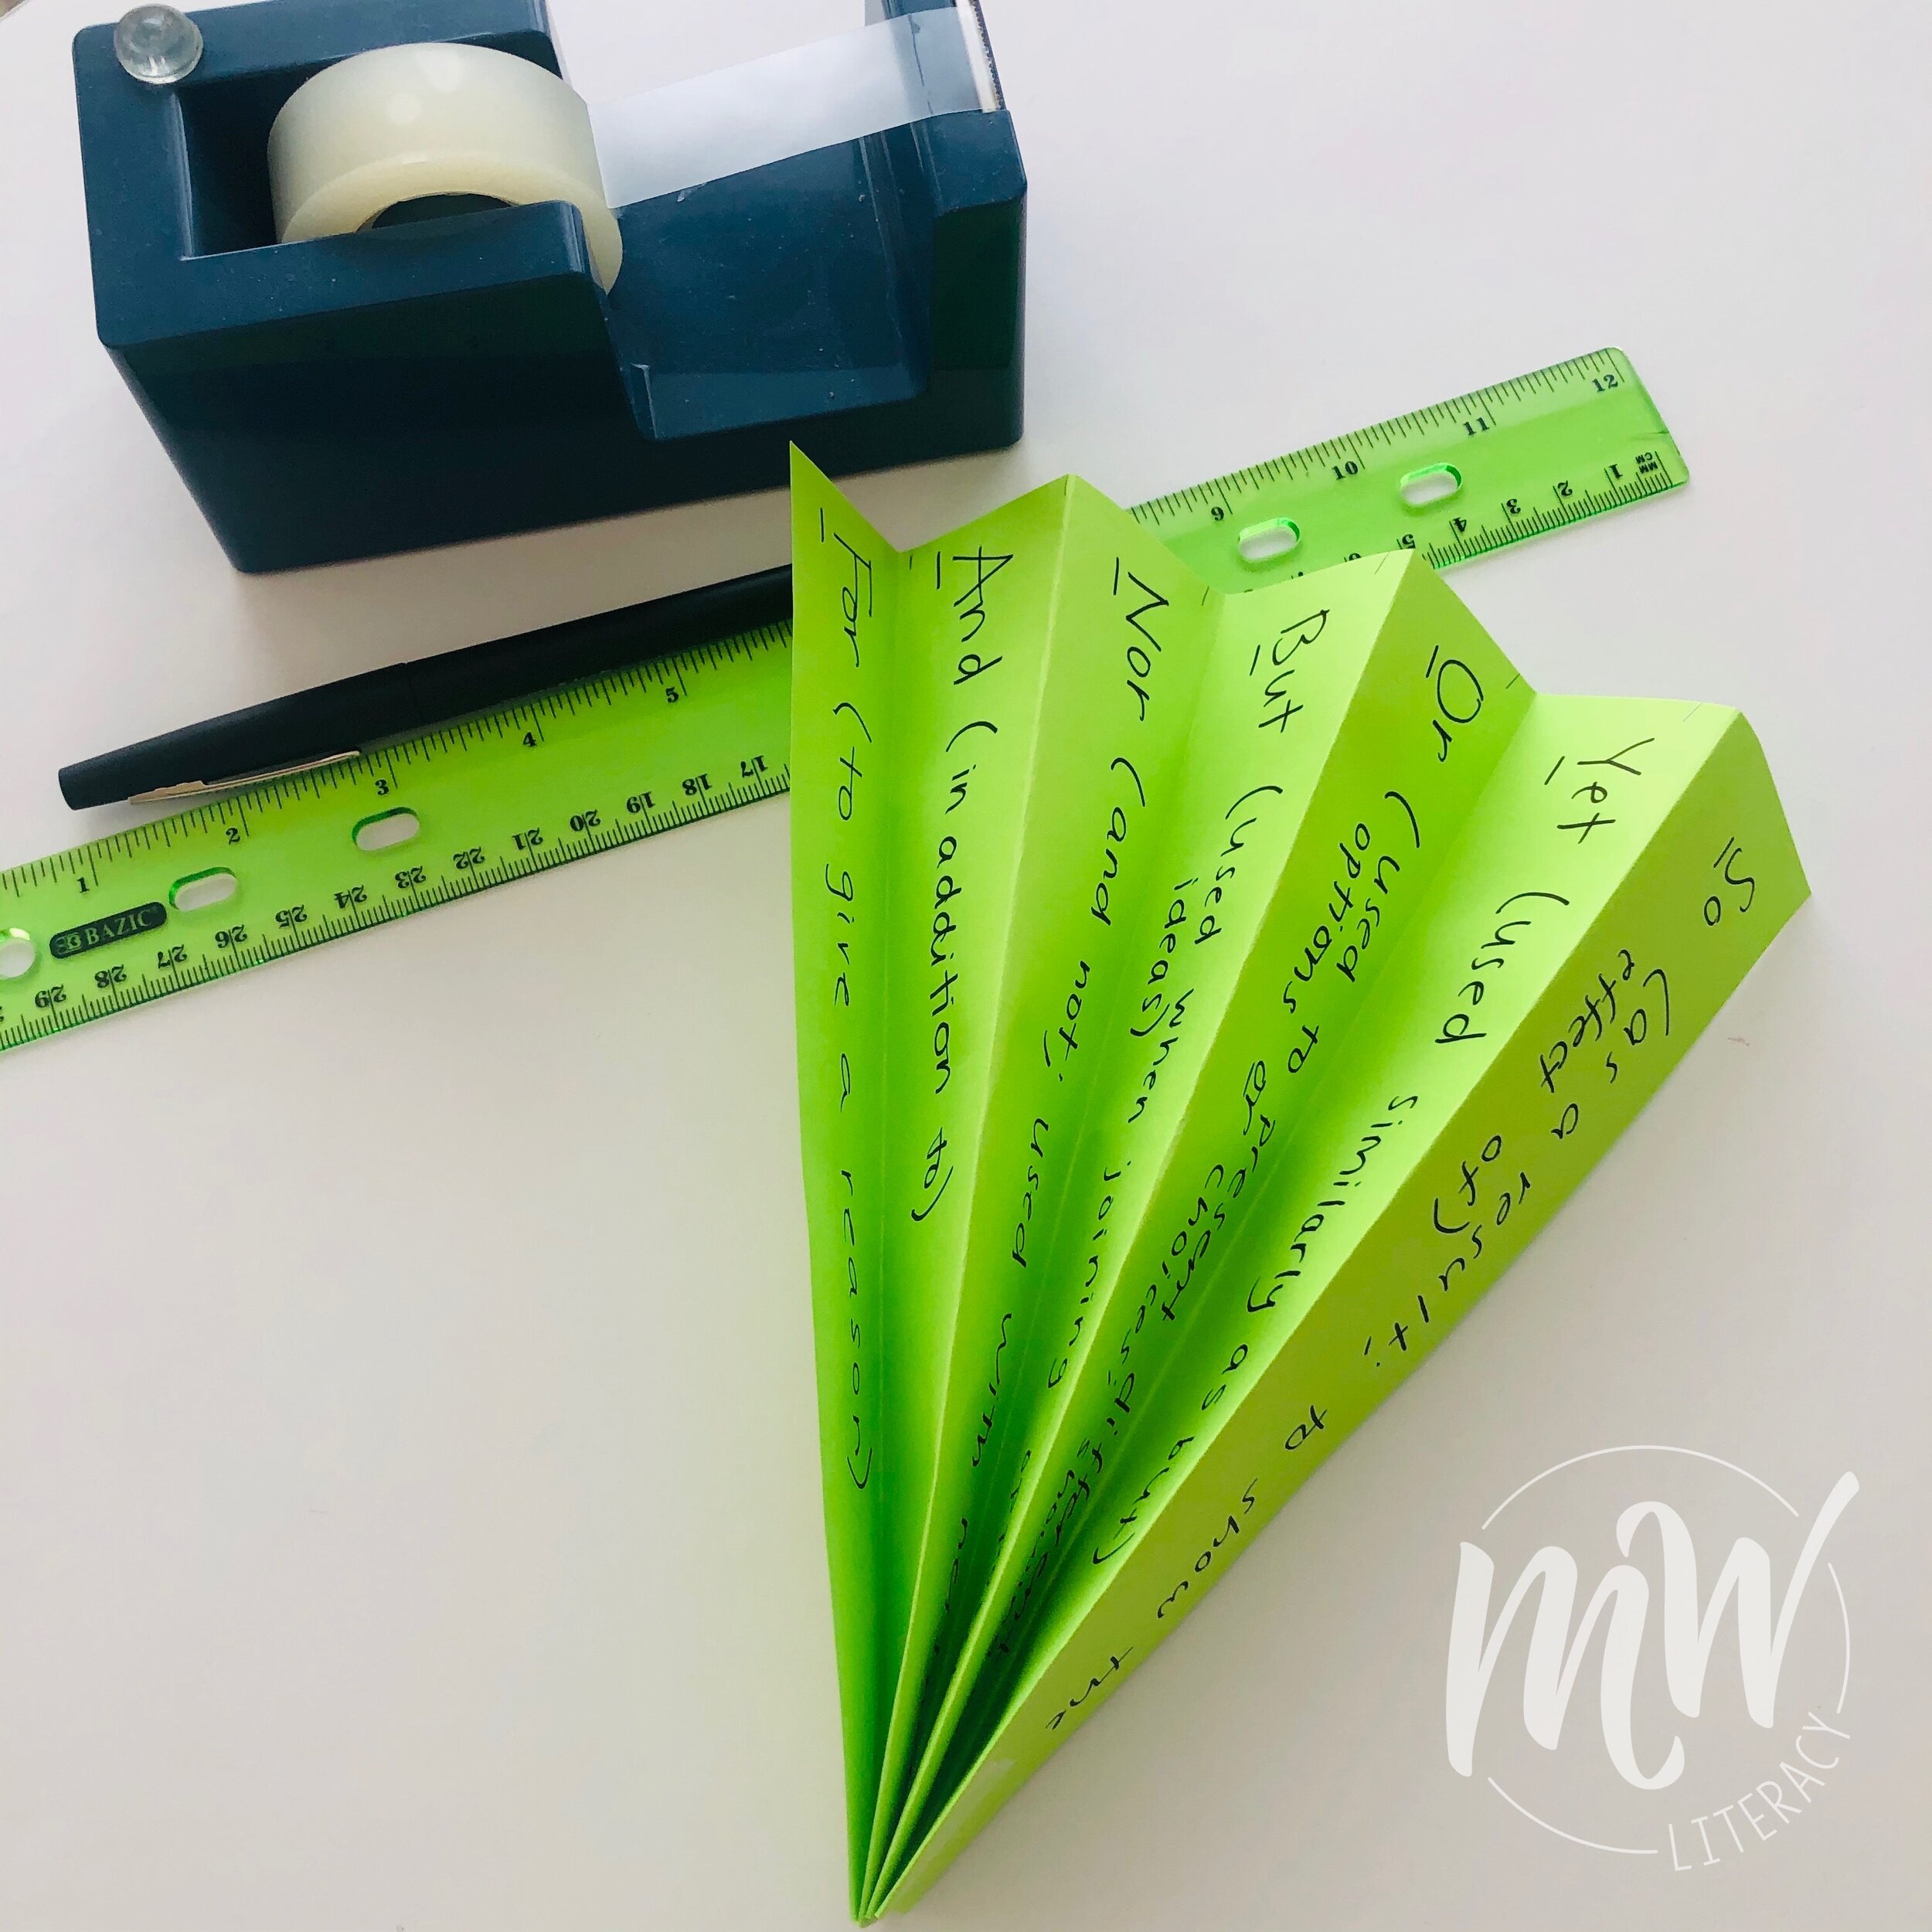
There are seven coordinating conjunctions that can be easily remembered using the acronym FANBOYS: for, and, nor, but, or, yet, so. A good visual is what always helps me most, so I designed this coordinating conjunction fan to demonstrate the usage of these conjunctions for all those other visual learners out there. Also, kids LOVE putting these together.  To make this handheld fan, follow these simple steps:

What You’ll Need

  • Standard size (8.5in x 11in) sheet of paper

  • Marker

  • Ruler

  • Tape

How To

  1. Use a rule (or you can eyeball it!) to make roughly 1.5in marks

  2. Make six horizontal folds. This will then allow for seven spaces, one for each conjunction. There is enough space to also include the purpose for and / or an example of each coordinating conjunction. 

  3. Write each conjunction and purpose (see below for details) in each space.

  4. On the bottom where the conjunction FOR is written, you can flip up the to the opposite side and write COORDINATING CONJUNCTIONS.

  5. Tape the bottom folds together to create a fan.

  • For a set-by-step video, you can hop on over to my Instagram page and watch it the reels section.

final 2.JPG

For

Purpose: To give a reason.

Example: I brought my umbrella with me when I left the house, for it was supposed to rain.


And

Purpose: To join words, phrases, or sentences that show a similar idea.

Example: Sam finished his homework, and then he ate his dinner.


Nor

Purpose: To introduce or present a further negative idea or statement.

Example: Jen does not like to travel in airplanes, nor does she like to travel on trains.


But 

Purpose: To show contrasting or opposite ideas. 

Example: They wanted to bake muffins, but they didn’t have all of the ingredients. 


Or

Purpose: To show a choice or different options.

Example: We can go to the beach this morning, or we can go this afternoon.


Yet

Purpose: To join two ideas that are opposite. Similar to the use of the word but.

Example: Pete studied every day for the test, yet he still did not do as well as he had hoped. 


So

Purpose: To show the result or effect of something (not to be confused with so as an adverb, meaning to a great extent)

Example: Three feet of snow fell last night, so we were not able to leave the house today. 


I hope these examples and demonstration help your learners master coordinating conjunctions a bit more easily!

STAY CONNECTED


Video Block
Double-click here to add a video by URL or embed code. Learn more